FREE ✨Smarticles!✨

Connect with ✨Your Smarticles✨ to get our latest content by email.

Powered by ConvertKit
Showing posts with label STEAM. Show all posts

Paper Chain Pixel Art

Here's How We Did It

Materials:

Pixelated image 25 x 25 squares
9 x 12 sheets of construction paper
Stapler(s)
Staples

It started by attempting to find an image that would fit the space we had available.  I'm not much for creating my own Pixel Art, so I was able to find this image by searching for Bead Art on Pinterest

paper chain art

(If you are interested in making your own pixelated creations, try this AMAZING resource created by Eric Curts.  It's a Google Sheet with formatting embedded that allows you to type a number in a grid and have a color appear)

The Process:

➡We began the project by picking our colors and pre-cutting strips measuring 2" X 8"

➡I found it VERY helpful to pre-draw the cutting lines on 1 sheet of white 9 x 12 paper and feeding blank pieces through so there were pre-printed cut lines.

Paper chain pixel art

➡Students then worked on each chain with a partner.  Each chain represented a vertical column in the design.  The first loop is a front facing loop and each front facing loop is a pixel in the chart.  The next loop is side facing, I call these connectors.  ALL of my connectors were white.
pixel art with construction paper
➡As students worked, one student would typically read the chart and line up the pieces, the other did the stapling.  While they worked, they referenced the columns they were assigned ( I gave each group a number and wrote the number on the starting loop) . We pinned each completed strand to a bulletin board strip for safe keeping.

paper loop art

paper chain pixelation

paper chain mosaic

➡As the image began to take shape, I quickly realized that some students were making tighter loops than others and the columns weren't perfectly lined up.  This isn't easy to rectify, but what I DID do was start stapling together each adjacent side facing loop to help line up the rows.  This made a BIG difference in the appearance of our design.

paper chain pixel art
This final project began with a pixel chart that was 25 squares x 25 squares.  The final dimensions of the project were approximately 5' x 5'  and our work is proudly hanging in the middle of the library.  😃


In the end, we had a pretty AWESOME looking project and a REALLY proud group of kids that were


Find me on Social Media


Twitter: @mrshoward118                             Instagram: @Using_Your_Smarticles

Email: yoursmarticles@gmail.com               Blog: yoursmarticles.blogspot.com

Teachers Pay Teachers: https://www.teacherspayteachers.com/Store/Using-Your-Smarticles

Cardboard Common Core Robots

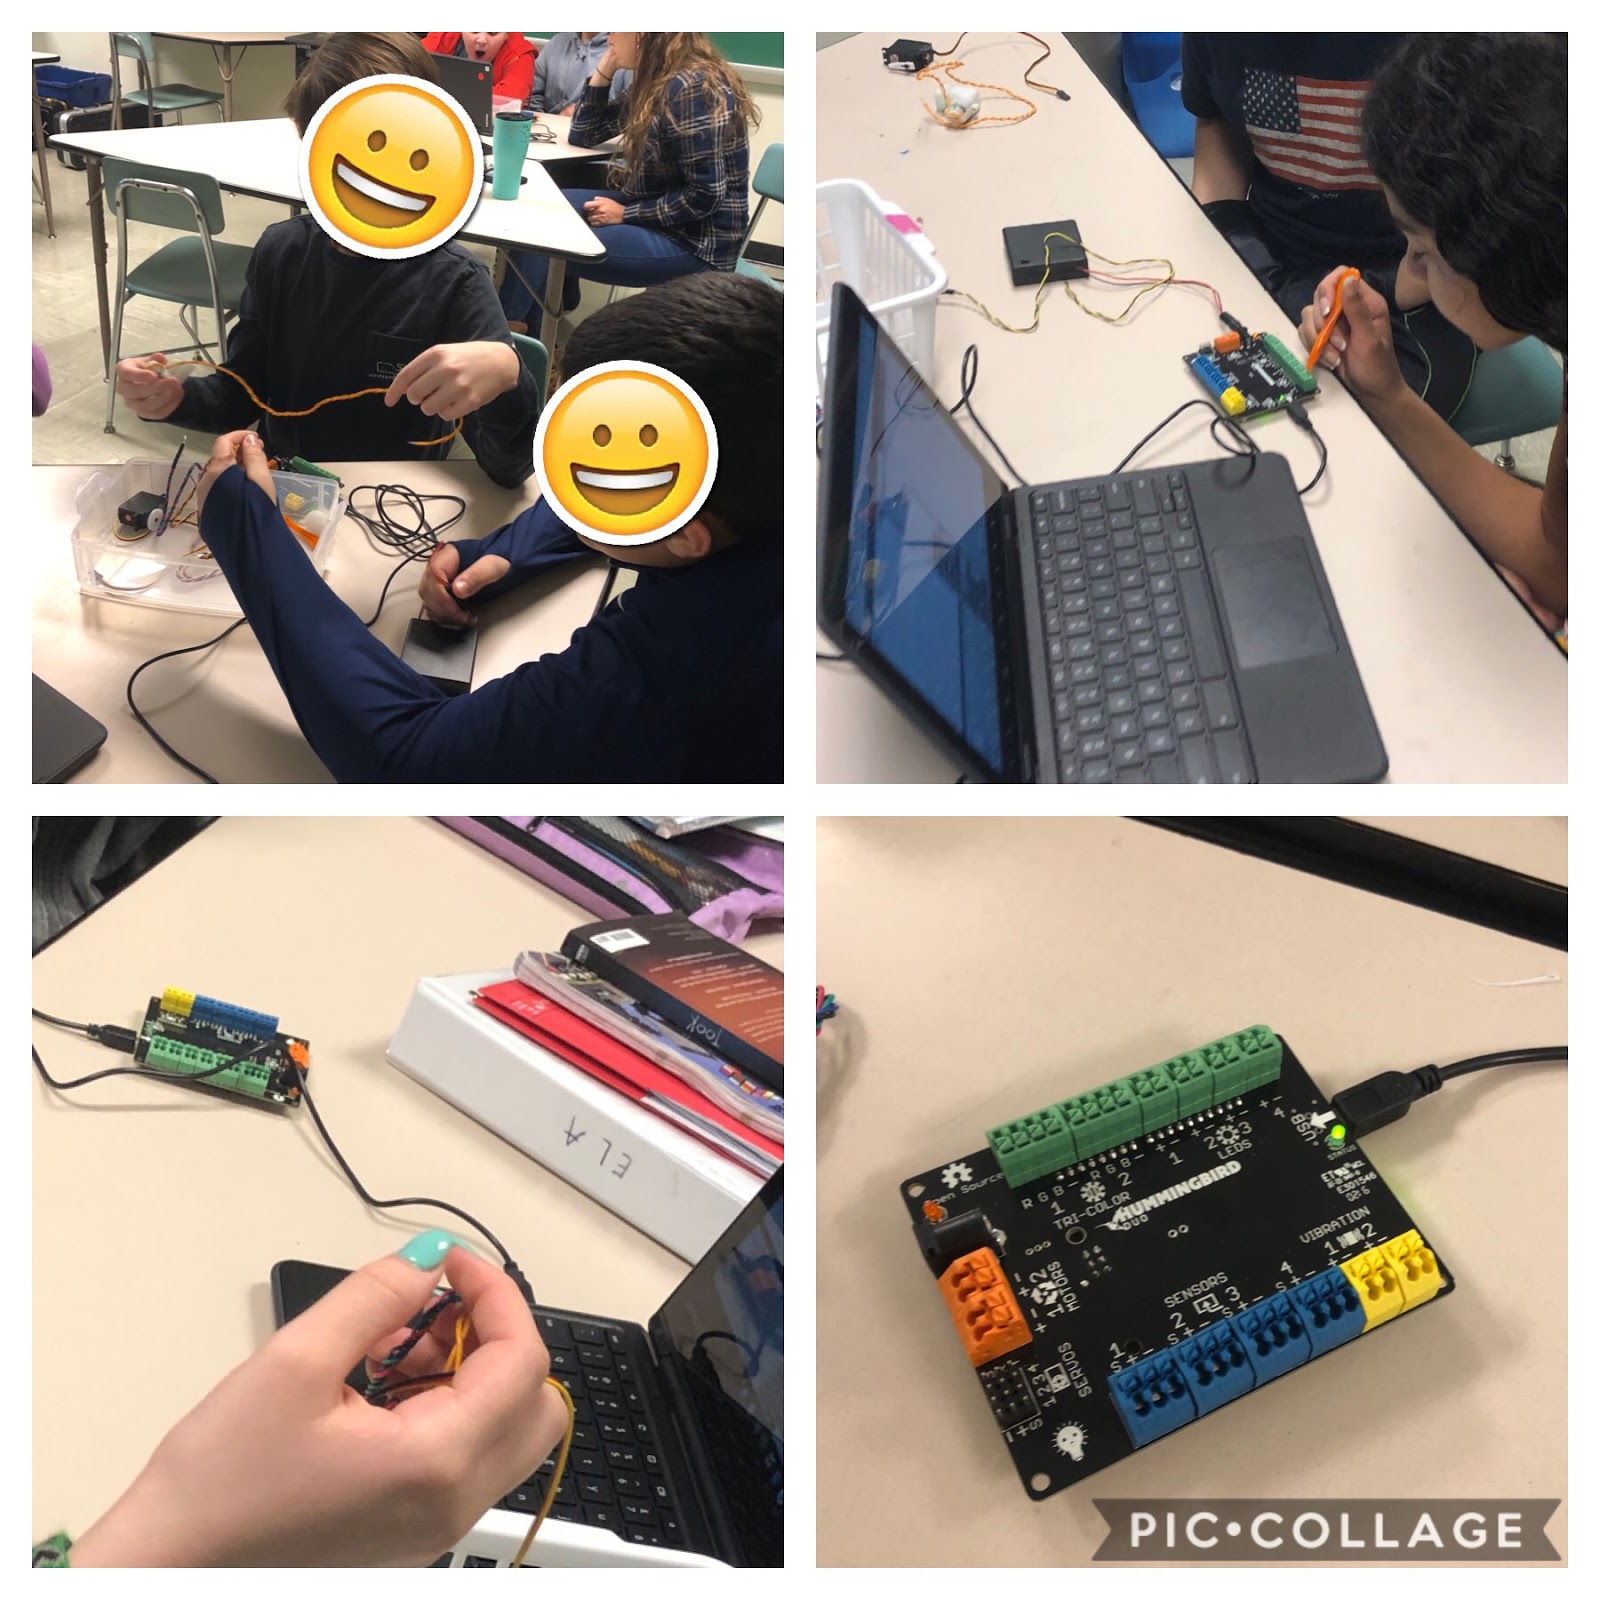
I'm thrilled to share a recent STEAM project that my students completed in ELA class....that's right, ELA class!!  We built cardboard robots using Hummingbird Circuits and then we used Scratch coding to program the movements of the robots.  WOW!

It all started with a Graphic Novel:


I had ALWAYS wanted to use a Graphic Novel for instruction, and upon perusing this engaging, high interest story, I knew it was the perfect springboard for our project.  Like every good novel study, we  want to explore the features of the novel in advance of reading.  Being a fan of technology, I thought Merge Cube would be a great way to introduce the elements embedded within a Graphic Novel such as:  gutter, panel, inferring, speech/thought bubbles, etc.  So I decided that Merge Cube would be a GREAT way to do that.

Merge Cube Overlay

Using the Merge Cube on page 21 of the book, students view an augmented reality overlay to learn the features of a graphic novel.


Here's the link to this interactive augmented reality overlay:  https://cospac.es/qt4U


Anthropomorphism

Our next focus was to evaluate the term "anthropomorphism".  My goal was for students to understand this term.  We spent time studying the term and brainstormed HOW we could demonstrate this in our robots.


The Hummingbird

The Hummingbird (by Birdbrain Technologies) is an Arduino driven circuitboard designed to work with LED lights, servos, motors and other sensors.  It's super user friendly and easy to set up.  Student's insert the wires into the circuit board and hot glue the servos, sensors or motors onto their cardboard creations.  It was so easy that my kids were up and running AND independent within a 1-40 minute session!!


Our Robots
We had an amazing explosion in creativity with this project. We worked for two weeks cutting, painting, assembling, coding and testing our creations. Students created anthropomorphic robots and articulated HOW the robots demonstrated anthropomorphism!  They coded their robot's movements in Scratch, added lights, uploaded and recorded sounds and took pride in their creations. Student's then presented their creations and stated claims about the anthropomorphic characteristics and then used evidence from their creations to support their claims.


Undoubtedly, student's enjoyed the project and we will do it again, but the important thing is they LEARNED!   We integrated STEAM into our ELA class and used our argumentative writing skills to support our claims regarding our anthropomorphic creations...creations that students took pride in making and sharing! 


...

STEM Project: Shamrock Circuit!

Certainly circuits seem intimidating at first, but honestly with a little patience and the right materials you can learn how to create a circuit and launch creative STEM learning experiences into your classroom!


I am presently working with my school librarian to set up a MakerSpace for my school and it is definitely QUITE a project.  Harvesting donations, acquiring storage space, establishing a vision, securing and funding supplies/materials and many other tasks loom large on my MakerSpace 'to do' list.

Convinced I would NOT become overwhelmed (I teach ELA and social studies too...😳), I decided to start small by creating a monthly STEM challenge.

Each month, a STEM challenge box will be waiting for students in the MakerSpace area in the library.  Students are invited to tackle the challenge.  Successful students must submit a reflection sheet:


Once students complete the project and submit their reflection sheet, they earn the monthly MakerSpace Challenge badge and have their name listed on the wall of fame!!

Badge created with http://www.onlinebadgemaker.com/


With rosey cheeks (enhanced by LEDs) and a cute little grin, I'm confident this lucky charmer will win my students over!

The whole concept of circuits was a bit intimidating to me at first, but the web is filled with valuable resources to make circuitry projects approachable for virtually ANYONE!  Some of the best resources I canvased to make this project were:  Makerspaces, MakeSparkFun and Instructables.

Each site provides excellent FREE printables, downloadable materials and instructions to get yourself launched into the world of the paper circuit.

My version of a paper circuit is this Shamrock circuit and it is a GREAT way to bring a robust STEM learning experience into your classroom!


Get the template here!!

Materials Needed:

1 Shamrock template sheet 
<--click get="" p="" to="" yours=""><----download br="" here="" yours="">●1 coin battery
●Copper Tape with conductive adhesive
●2 LED lights (Light Emitting Diode)
●Regular Adhesive Tape
●Scissors
●Binder Clip
●Reflection Sheet
●Markers/colored pencils for added decoration

Directions:

  • Establish a parallel circuit by adhering the copper tape from the battery resting place along the guidelines on the template
  • Punch through 2 LED lights to form the 'cheeks'
  • Spread the LED terminals so that the longer one touches the + side and the shorter one touches the - side.  Tape in place.
  • Place battery + side up on the marked location
  • Fold corner along the foldline to connect the copper to the battery and clip with a binder clip to secure.
  • Decorate.
Want more?   


Certainly circuits are worth trying, as long as you're:

✨Using Your Smarticles✨

Need materials?  Here are my Amazon affiliate links:

Copper Tape:

Bullet Face Copper Foil Tape with Double-sided Conductive (1/4inch X 21.8yards)- EMI Shielding,Stained Glass,Soldering,Electrical Repairs,Slug Repellent,Paper Circuits,Grounding (1/4inch)

LED:

LED Diode, CO RODE 3mm 5mm LED Lights Emitting Diodes Assorted Clear Bulbs Kit with (White Red Blue Green Yellow, 300-Pack)


Nickel Batteries:

50 Pack 3V High capacity Lithium Button Coin Cell Batteries CR2032 DL2032 ECR2032 GPCR2032 Used in most electronic devices